Texture Synthesis : Generating arbitrarily large textures from image patches.
In today’s article, we are going to use a simple patch-based method for generating visual appearance i.e. new image is synthesized by stitching together small patches of an existing image. Texture Synthesis is an object of research in Computer Graphics and is used in many fields like Digital Image Editing, 3D Computer Graphics, and Post-Production of Films.

Table of Content
- What is Texture Synthesis?
- About Patch-Based Method
- Experiments
- What’s Next?
- Conclusion
- References
Before jumping to the method, first, understand the need for Texture Synthesis.
What is Texture Synthesis?
It is a technique of generating arbitrarily large textures from small real-world samples. The idea is that we get the input image of some texture and we want to get other images that look like that same texture. So the assumption here is that somewhere out there, in the real world there exists true infinite texture and the input image is just a small sample may be like a little deep hole that you are looking at there at the grand big texture and we want to get just some more samples of that texture. There are several assumptions here and one of them is input image is somehow large enough to capture the essence of this texture.
The main challenge for texture synthesis is that there are lots of different textures like some textures are purely repeated ( These textures look like somewhat regular patterns), some are stochastic (Texture images of stochastic textures look like noise: color dots that are randomly scattered over the image) and most of the textures fall somewhere between this two.

Now let’s move to the patch-based method!
About Patch-Based Method
We are going to understand a patch-based method which is also known as Image Quilting. First, we will define the unit of synthesis Bi which is the square block and the size is defined by the user. We have set S₊ of all these square blocks and this is overlapping blocks from the input image.
The simplest and naive approach is Random Block Placement in which we will randomly select the patches (Bi) from the input texture and place them onto a target image of a larger size. This can be done by looping from left to right, top to bottom (rendering order), and placing randomly sampled blocks from S₊ next to each other.
Let’s go through the code for Random Block Placement !
The quilt function (Line 8) is our main function. From Line 9–16, the input image is read, and according to given block-size and number of blocks the size of the target, image is defined. From Line 20–36, the target image is generated from left to right and top to bottom, based on the type of mode selected. First, we select the mode “Random” ,and perform Random Block Placement (Line 1–6) in which we randomly select the block from the input image. See the image generated using the same below.

As from the above image, we can see that the blocks do not match, and also we have done smoothing across the edges but, still the target image is not satisfying.
So next, what we can do to overcome this?
By using Neighboring Block constrained by Overlap i.e. to introduce some overlap in the placement of blocks onto the new image. The selection of the top left patch is random then selects the next patch from S₊ which minimizes the overlap error (L2 norm). The new block is placed partially overlayed on the previous block exact from the middle.
Let’s go through the code for Neighboring Block constrained by Overlap!
When we select the “Best” mode in our quilt function (Line 20 from Random_Block_Placement.py ), it selects the next patch randomly and calculate the L2 norm error with the previous block from the top and left as described in above code snippet from Neighboring Block constrained by Overlap.py. See the image generated using the same below.
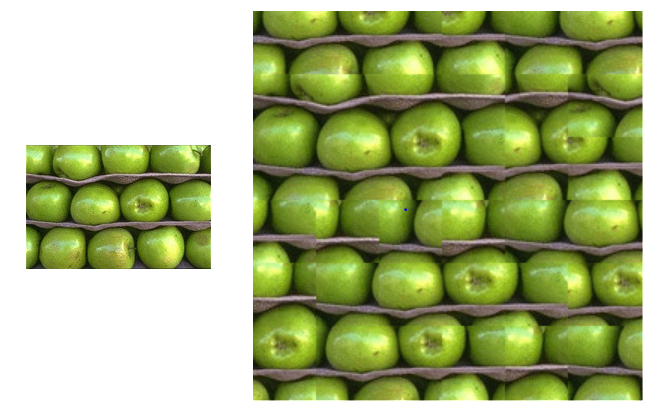
The above image show improvement in the structure of the target image, the smoothing across the edges is done but the edges between the blocks are noticeable.
So, what’s next?
To remove these noticeable edges, instead of a straight line between the two patches we can use the Minimum Error Boundary Cut method. Before placing a chosen block into the target image we check the error in the overlap region between it and the other blocks. We find a minimum cost path through that error surface and declare that to be the boundary of the new block.
Let’s go through the code for the Minimum Error Boundary Cut method!
When we select “Cut” mode in our quilt function (Line 20 from Random_Block_Placement.py ), it selects the next patch randomly as and check the error in the overlap region between it and the other blocks as described in above code snippet from Minimum Error Boundary Cut method.py. See the image generated using the same below.
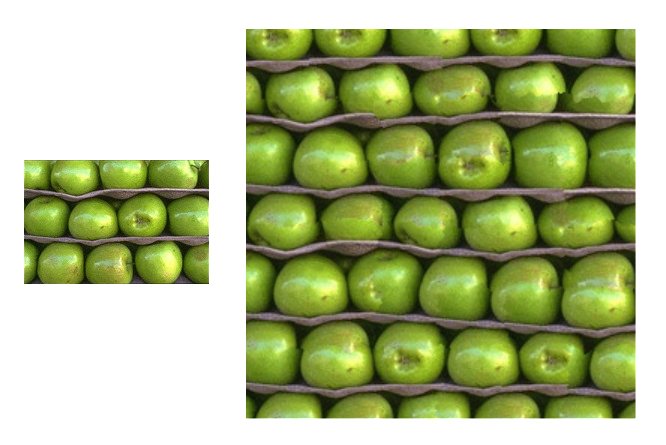
The above image shows that the generated target image is satisfying and edges are also smooth.
Now we have a good understanding of the method, let’s see some more examples.
Experiments
For wide variety of input textures, the result of texture synthesis can be seen below.

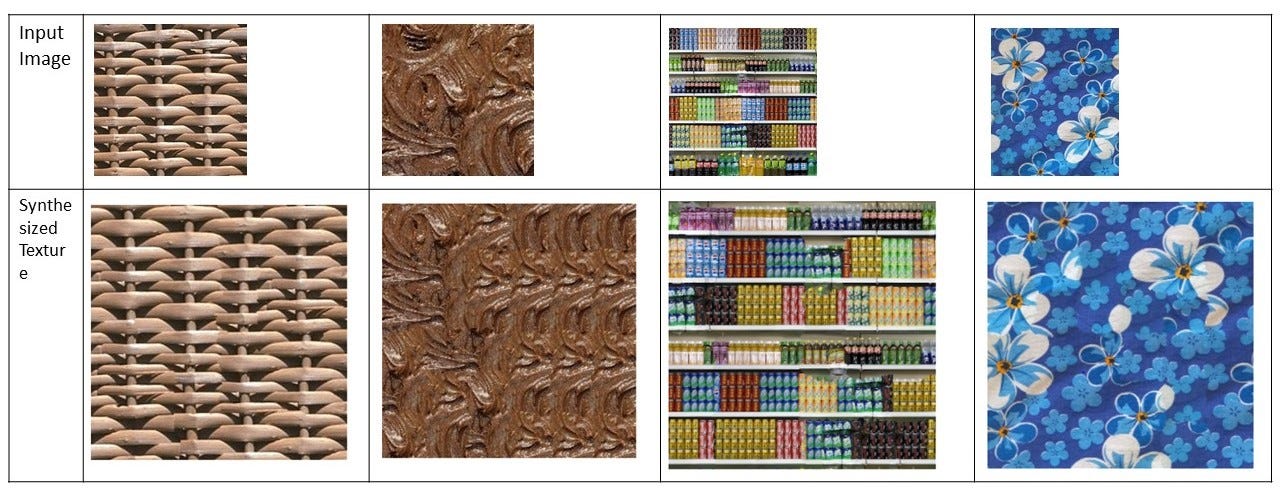
Firstly, the algorithm performs well on stochastic and very regular textures, but user-specified parameters like block size, number of blocks, and type of input texture greatly influenced the quality of results.
Secondly, the algorithm is not only trivial to implement but is also quite fast: the code generated the target image in seconds depending upon the size of input texture and target texture.
What’s Next?
The patch-based texture synthesis algorithms are very useful for generating a synthesized image, simple procedure, and low computational cost. The algorithm can be extended to perform texture transfer — rendering an object with a texture taken from a different object as shown in the original paper “Image Quilting for Texture Synthesis and Transfer”.
Also, most recently deep learning approaches like Convolutional Neural Network (CNN) and Generative Models for texture synthesis (GANs) have proven to be a very effective way of generating texture.
Conclusion
In this article, we perform an analysis of the patch-based algorithm and its quantitative and qualitative performance. This patch-based synthesis algorithm works remarkably well but required quite a bit of hand-tuning of parameters to get visually-pleasing results!
Also, the GUI implementation of texture synthesis is done using pyqt5, which is python pkg for creating Desktop Application. Let’s look at the GUI implementation video.
The understanding of patch-based algorithm is key to use it in other applications!
References
It’s always to give references!
The code is available at github.com/Devashi-Choudhary/Texure-Syntheis. For any questions or doubts, feel free to contact me directly at github.com/Devashi-Choudhary.
